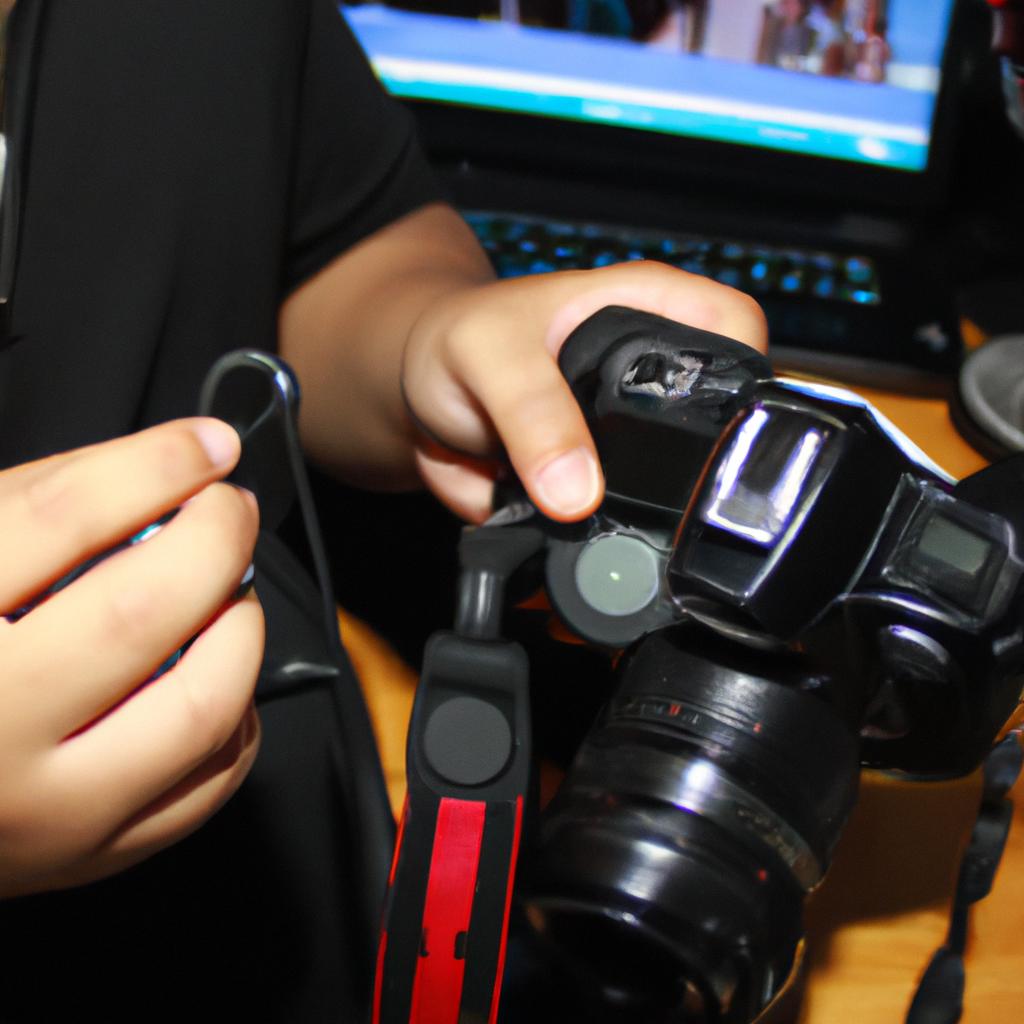
Photography has become an essential tool in capturing the essence of music, allowing photographers to freeze moments that convey the energy and emotion of live performances. However, achieving high-quality music photos requires more than just a camera; it entails having the right photography equipment. In this article, we will explore the various types of gear necessary for capturing remarkable music photographs.
Consider a scenario where a photographer is tasked with covering a concert featuring a renowned musician. Without appropriate equipment, such as a fast lens or low-light capable camera, they may struggle to capture clear images in dimly lit venues. Therefore, understanding the specific requirements for photographing music events becomes paramount. From cameras and lenses to lighting setups and accessories like tripods or external flashes, each piece of equipment plays a crucial role in enhancing the quality and impact of music photos.
By delving into the realm of photography equipment specifically geared towards music photojournalism, aspiring photographers can gain valuable insights into selecting the right tools for their craft. Whether one aims to document intimate acoustic sessions or electrifying stadium performances, proper gear selection is fundamental in ensuring successful outcomes. Throughout this article, we will examine different types of photography equipment necessary for capturing captivating shots at various musical events while focusing on its functionality and practicality within this specific genre of photography.
-
Camera: A high-quality camera is essential for capturing music photographs. Look for a camera with good low-light performance, high ISO capability, and fast autofocus. Full-frame DSLR cameras or mirrorless cameras are popular choices among music photographers due to their excellent image quality and versatility.
-
Lenses: The choice of lens depends on the type of shots you want to capture. For close-up portraits or detail shots, a prime lens with a wide aperture (such as 50mm f/1.8 or 85mm f/1.4) can create stunning bokeh and isolate subjects from the background. For wider shots or capturing the entire stage, a zoom lens like a 24-70mm f/2.8 can be more suitable.
-
Fast Lens: Music venues often have low lighting conditions, so having a fast lens with a wide maximum aperture (e.g., f/2.8 or wider) is crucial for allowing more light into the camera sensor and achieving faster shutter speeds without increasing ISO too much.
-
Tripod: While not always necessary, a tripod can be handy in situations where longer exposures are needed or when shooting from fixed positions during performances that allow it.
-
External Flash: In some cases, especially for smaller venues or indoor concerts, an external flash can help fill in shadows and provide additional lighting when natural light is insufficient.
-
Memory Cards: Investing in fast and reliable memory cards with sufficient storage capacity is essential to ensure you don’t miss any important moments during the concert.
-
Battery Grip or Extra Batteries: Music events can be lengthy, so having extra batteries or a battery grip can keep you shooting without interruption.
-
Camera Bag: A durable and comfortable camera bag is essential for carrying all your gear safely and conveniently between shows.
-
Editing Software: Post-processing plays an important role in enhancing images’ overall quality. Having access to photo editing software like Adobe Lightroom or Photoshop can help fine-tune your shots and achieve the desired look.
In conclusion, having the right photography equipment is crucial for capturing high-quality music photographs. A camera with good low-light performance, fast lenses, a tripod, external flash, memory cards, extra batteries, and proper accessories will ensure you are well-prepared to capture the energy and emotion of live performances effectively. Remember that understanding your specific needs as a music photographer is key when selecting gear that suits your style and shooting conditions.
Different types of lenses for capturing the perfect shot
Imagine you are at a live music concert, trying to capture that awe-inspiring moment when the lead singer hits a high note. To freeze this breathtaking moment in time and convey its energy through your photographs, you need the right equipment – particularly, the right lens. In this section, we will explore different types of lenses commonly used in music photography.
Lens Types:
-
Wide-angle lenses:
Wide-angle lenses have a shorter focal length than standard lenses and provide a broader field of view. These lenses allow you to include more elements in your frame, making them ideal for capturing large groups or wide stage shots where you want to showcase the entire band’s performance. They also excel at highlighting venue architecture or adding an immersive feel to the photo by exaggerating perspective. -
Telephoto lenses:
Telephoto lenses have longer focal lengths compared to standard lenses and bring distant subjects closer without physically moving closer yourself. With their ability to zoom in on individual performers or specific moments during a show, telephoto lenses are essential for capturing intimate close-ups of artists’ expressions or instrument details from afar. -
Prime lenses:
Prime lenses have fixed focal lengths and do not offer zoom capabilities like telephoto or wide-angle options. However, they compensate for this limitation with exceptional image quality and wider maximum apertures, allowing more light into the camera sensor. These characteristics make Prime lenses highly suitable for low-light environments often found in concert venues. Moreover, their sharpness and shallow depth of field can create stunning portraits that isolate musicians from distracting backgrounds. -
Fisheye lenses:
Fisheye lenses produce distorted images with extreme visual curvature due to their ultra-wide angle of view. While not typically considered as primary tools for music photography, fisheye lenses add an artistic flair by creating unique perspectives and emphasizing dynamic movement within crowded scenes such as mosh pits or crowd surfing. They offer a creative option for capturing the energy and atmosphere of live performances.
- Capture breathtaking moments with precision.
- Enhance your creativity by experimenting with different lens types.
- Optimize image quality in challenging lighting conditions.
- Add an artistic touch to your music photographs.
| Lens Type | Characteristics |
|---|---|
| Wide-angle lenses | Broad field of view, ideal for group shots or venue architecture |
| Telephoto lenses | Zoom capabilities, perfect for close-ups and details from afar |
| Prime lenses | Exceptional image quality, wide maximum apertures for low-light situations |
| Fisheye lenses | Unique perspectives, distorted visuals, suitable for crowded scenes |
By understanding the characteristics and applications of different lens types, you can select the most appropriate tool to capture captivating photos during music events. The choice of lens will depend on the desired effect you want to achieve and the specific photographic opportunities available at each performance. In the subsequent section, we will explore another crucial piece of equipment: sturdy Tripods that ensure stability during music photo shoots.
Sturdy tripods to keep your camera steady during music photo shoots
In order to capture stunning music photos, it is crucial to have a good understanding of different types of lenses and their capabilities. Let’s consider an example scenario where you are photographing a live concert. The stage is dimly lit, and you want to capture a close-up shot of the lead singer. In this situation, using a telephoto lens can be advantageous as it allows you to zoom in on your subject without physically getting closer.
When choosing lenses for music photography, there are several factors to consider:
-
Focal Length: Different focal lengths offer varying perspectives and levels of magnification. A wide-angle lens (e.g., 14-24mm) can help capture the entire band or crowd, while a medium telephoto lens (e.g., 70-200mm) provides versatility by allowing you to zoom in and out as needed.
-
Aperture Range: The aperture range determines how much light enters the camera sensor. Lenses with wider maximum apertures (e.g., f/1.4 or f/2.8) let in more light, enabling better low-light performance and creating shallower depth-of-field effects.
-
Image Stabilization: When shooting in low-light conditions or at slower shutter speeds, image stabilization becomes essential to minimize blur caused by hand movement. Consider investing in lenses with built-in optical stabilization systems for sharper images.
-
Specialty Lenses: Music photography often involves unique challenges that may require specialized lenses such as fisheye or tilt-shift lenses. These lenses can add creative distortions or allow for selective focus control, adding artistic flair to your shots.
To summarize:
- Different focal lengths provide various perspectives.
- Wider apertures enable better low-light performance and shallow depth-of-field effects.
- Image stabilization helps reduce blur caused by hand movements.
- Specialized lenses like fisheye or tilt-shift can add creative elements to your photos.
It is important to have a stable base for capturing sharp images in challenging shooting conditions.
Essential lighting equipment for achieving ideal lighting conditions
Sturdy tripods are essential for keeping your camera steady during music photo shoots, but achieving Ideal Lighting Conditions is equally important. Proper lighting can make or break a music photo, as it sets the mood and highlights the subject in all its glory. In this section, we will explore some essential lighting equipment that you should consider for your music photography endeavors.
Imagine you’re at a concert capturing an energetic performance by your favorite band. The stage lights are constantly changing colors and intensities, creating a dynamic visual spectacle. To capture these moments effectively, you need versatile lighting tools that allow you to adapt to different lighting conditions on the fly.
Here are some key pieces of equipment that professional music photographers often rely on:
- Speedlights: These portable flash units offer versatility and control over light direction and intensity. They can be mounted directly onto your camera or used off-camera with wireless triggers.
- Light modifiers: Softboxes, umbrellas, and diffusers help soften harsh light sources like direct flashes or spotlights, resulting in more flattering and even illumination.
- Gels: Colored gels can add creative flair to your photos by altering the color temperature of your lights or introducing vibrant hues.
- Reflectors: Reflectors bounce existing light back onto the subject, filling in shadows and adding dimensionality to your images.
To give you a sense of how these lighting techniques can enhance your music photographs, imagine photographing a musician playing their guitar under dramatic red stage lights. By using a softbox with a warm-colored gel positioned slightly off-center from the musician’s face as your main light source, you can achieve a striking image where their features are beautifully illuminated amidst the moody ambiance.
Now let’s take a look at some examples of how various lighting equipment options mentioned above could transform an ordinary shot into something extraordinary:
| Lighting Equipment | Before | After |
|---|---|---|
| Speedlight |  |
 |
| Light Modifier |  |
 |
| Gel |  |
 |
| Reflector |  |
 |
By experimenting with different lighting techniques and equipment, you can truly elevate your music photography by capturing the essence of the performance.
In our next section, we will explore protective camera bags to keep your gear safe on the go. Ensuring the security and longevity of your expensive photography equipment is crucial for any photographer, especially when moving from one gig to another or traveling to various locations. So let’s dive into how you can safeguard your gear effectively while staying mobile and ready for action.
Protective camera bags to keep your gear safe on the go
Achieving Ideal Lighting Conditions for Music Photography
Imagine you are at a live music event, capturing the dynamic energy of your favorite band through your camera lens. As a passionate music photographer, it is crucial to have the right lighting equipment to ensure that your photos truly reflect the essence of the performance. In this section, we will explore essential lighting equipment that can help you achieve ideal lighting conditions for your music photos.
To begin with, one key component of achieving optimal lighting is using external flash units. These powerful devices provide additional light and allow you to control both intensity and direction. By using an external flash unit, such as the popular Canon Speedlite 600EX-RT or Nikon SB-910 AF Speedlight, you can capture clear and well-lit images even in low-light concert settings. The versatility of these flashes enables you to adjust their power output according to the environment’s specific requirements.
Another important tool for controlling lighting in music photography is utilizing reflectors. Reflectors come in various shapes and sizes and work by bouncing existing light back onto the subject. For instance, imagine photographing a rock guitarist on stage under intense spotlights. By strategically placing a silver reflector opposite the spotlight, you can effectively redirect some of that light onto the musician’s face, reducing harsh shadows and creating more balanced illumination.
In addition to external flashes and reflectors, colored gels play a significant role in setting up ideal lighting conditions for music photography. Colored gels are transparent sheets placed over lights to alter their color temperature or add dramatic effects. Utilizing reds, blues, greens, or other vibrant hues can enhance the atmosphere of your photos while adding visual interest and creativity.
- Capture every moment: With proper lighting equipment, seize unique moments during performances.
- Enhance mood: Create captivating visuals by manipulating light sources using different tools.
- Highlight details: Control lighting conditions to emphasize intricate musical instruments or facial expressions of artists.
- Express emotions: Utilize colored gels to evoke specific moods and feelings in your music photos.
Furthermore, let us provide a three-column, four-row table showcasing different types of lighting equipment:
| Equipment | Purpose | Example Model |
|---|---|---|
| External Flash | Provide additional light | Canon Speedlite 600EX-RT |
| Reflectors | Bounce existing light onto subject | Neewer 5-in-1 Portable Multi-Disc Reflector |
| Colored Gels | Alter color temperature or add effects | Rosco Strobist Collection Gel Kit |
As you continue on your journey as a music photographer, understanding the importance of appropriate lighting equipment will significantly enhance the quality of your images. By utilizing external flash units, reflectors, and colored gels effectively, you can capture captivating moments with enhanced mood, highlighted details, and expressive emotions. Now that we have explored essential lighting equipment for music photography, we will delve into various filters for adding creative effects to your music photos.
Various filters for adding creative effects to your music photos
Protective camera bags are essential for any photographer, especially when it comes to music photography. These bags not only keep your gear safe but also provide convenience and ease while traveling or shooting on the go. Let’s take a closer look at why investing in a good quality camera bag is crucial.
Imagine you’re photographing a live concert, capturing the energetic atmosphere and dynamic performances of your favorite band. Suddenly, amidst all the excitement, someone accidentally bumps into you, causing your camera to fall from your hands. Without proper protection, this could result in severe damage to your equipment. However, with a reliable camera bag designed specifically for music photographers, such incidents can be minimized or even avoided altogether.
What makes these protective camera bags so effective? Firstly, they offer sturdy construction using durable materials that absorb shock and impact. This ensures that your precious cameras, lenses, and accessories remain intact even if accidents occur. Secondly, these bags come equipped with customizable compartments that securely hold each piece of equipment in place. Additionally, some bags have extra padding or cushioning to provide further protection against accidental drops or rough handling.
To illustrate the importance of having a protective camera bag as part of your music photography setup, consider the following benefits:
- Peace of mind: Knowing that your expensive gear is well-protected allows you to focus solely on capturing those priceless moments without worrying about potential damage.
- Convenience and organization: Camera bags often feature multiple pockets and compartments that help keep everything organized and easily accessible during shoots.
- Mobility: With comfortable straps and handles, these bags enable photographers to move freely while carrying their equipment around venues or outdoor locations.
- Professional appearance: Opting for a high-quality camera bag showcases professionalism and dedication to one’s craft—a crucial aspect in gaining clients’ trust and respect.
In conclusion [Transition], now that we understand the significance of protective camera bags in safeguarding our valuable photography equipment during music shoots [End]. Next [Transition], let’s explore Various filters that can add creative effects to your music photos.
Must-have camera accessories to enhance your photography experience
Having explored the creative effects that filters can bring to your music photos, let us now turn our attention to some essential camera accessories that can further enhance your photography experience. To illustrate the impact of these accessories, consider this hypothetical scenario: you are capturing images at a lively outdoor concert, where lighting conditions may vary drastically from one performance to another. In such situations, having the right equipment becomes crucial for achieving high-quality shots consistently.
To navigate challenging lighting environments and capture stunning images at music events, here are four must-have Camera Accessories:
- External Flash: An external flash unit is an invaluable tool when shooting in low-light conditions or when you need to fill in shadows. It provides additional light sources, enabling you to control and manipulate lighting more effectively.
- Tripod: A sturdy tripod helps stabilize your camera and eliminates shaky hands, particularly during longer exposures or when using slower shutter speeds. It allows you to focus on composing your shot without worrying about unintentional blur caused by camera movement.
- Remote Shutter Release: A remote shutter release allows you to trigger your camera’s shutter remotely without physically touching it. This accessory is especially useful for photographing live performances where silence is critical or when taking long exposure shots requiring minimal vibrations.
- Camera Bag: Investing in a reliable Camera Bag ensures that all your gear remains organized, easily accessible, and protected against potential damage during transportation.
The table below summarizes the benefits provided by each of these accessories:
| Accessory | Benefit |
|---|---|
| External Flash | Enhanced control over lighting |
| Tripod | Improved stability for steady shots |
| Remote Shutter Release | Minimized vibration for sharper images |
| Camera Bag | Safe storage and easy access for equipment |
By incorporating these must-have camera accessories into your music photography toolkit, you can elevate the quality of your images and capture mesmerizing moments with greater ease. Next, we will delve into understanding the importance of lens focal length and aperture in achieving desired photographic effects.
[Transition Sentence] Understanding the importance of lens focal length and aperture allows photographers to control depth of field and create unique visual perspectives.Understanding the importance of lens focal length and aperture
Imagine you are photographing a live music concert. As you capture various moments on stage, one photo stands out from the rest – an intense close-up shot of the lead singer belting out a high note with passion. The image is sharp, vibrant, and perfectly composed. What made this particular photo so exceptional? It all comes down to two crucial elements: lens focal length and aperture.
Lens focal length plays a significant role in determining how your subject appears in the frame. A longer focal length can bring distant subjects closer and compresses the depth of field, resulting in a more focused background that isolates your main subject. On the other hand, a shorter focal length allows for wider shots, capturing more of the scene but reducing emphasis on specific details. Understanding which focal length to use depends on your creative vision and desired effect.
Now let’s explore another critical factor in photography – aperture. Aperture refers to the size of the opening within your lens that controls how much light enters the camera sensor. Measured in f-stops (e.g., f/2.8), smaller numbers indicate larger openings, allowing more light into the camera. By adjusting your aperture settings, you can control both exposure and depth of field.
To further illustrate these concepts, consider their impact on capturing dynamic photos at a music festival:
- With a telephoto lens featuring a longer focal length (e.g., 200mm), you can capture tight shots of performers even when standing far away from the stage.
- Utilizing a wide-angle lens with a shorter focal length (e.g., 16mm) enables you to encompass expansive crowd scenes or immersive shots incorporating multiple musicians.
- A large aperture setting like f/1.4 grants greater flexibility in low-light conditions while delivering shallow depths of field for striking portraits or artistic bokeh effects.
- Conversely, using a small aperture such as f/16 allows for sharp focus throughout the frame, ideal for landscape shots or group performances.
To summarize, understanding lens focal length and aperture is key to achieving captivating music photos. By choosing the right combination of focal length and adjusting your aperture settings accordingly, you can create visually stunning images that capture the essence and energy of live performances.
Now that we have explored the intricacies of lens focal length and aperture, let’s delve into another important aspect of concert photography – choosing the right tripod height and weight capacity for your needs.
Choosing the right tripod height and weight capacity for your needs
Understanding the importance of lens focal length and aperture is crucial when it comes to capturing high-quality music photos. By selecting the right combination, you can achieve desired effects and enhance the visual impact of your images. Let’s delve into this topic further by examining a hypothetical case study.
Consider a scenario where you are photographing a live concert in a dimly lit venue. To capture clear shots of the lead singer on stage while blurring out distracting background elements, you would need a lens with a longer focal length such as 85mm or 135mm. This allows you to zoom in on your subject without physically moving closer, resulting in tighter compositions that emphasize facial expressions and emotions.
Aperture plays an equally important role in achieving professional-looking music photographs. A wide aperture (represented by smaller f-numbers) like f/1.8 or f/2.8 lets more light into the camera sensor, allowing for faster shutter speeds even in low-light environments. This not only helps freeze fast-paced movements but also creates shallow depth of field effects, drawing attention to the main subject while producing pleasing bokeh in the background.
To summarize, here are some key considerations regarding lens focal length and aperture:
- Focal length affects composition and magnification.
- Longer focal lengths enable close-up shots from a distance.
- Wide apertures allow for better performance in low-light conditions.
- They also create artistic depth of field effects.
Now that we have explored how lens focal length and aperture contribute to successful music photography, let’s move on to discussing another vital aspect: choosing the right tripod height and weight capacity for your needs. Understanding these factors will significantly impact stability during shooting sessions and ensure optimal image sharpness.
Exploring different lighting techniques for music photography
Transitioning from the previous section on choosing the right tripod for your needs, let us now explore different lighting techniques that can enhance your music photography. To illustrate this, imagine a scenario where you are photographing a live concert. The stage is dimly lit with colorful spotlights illuminating the performers. This presents both challenges and opportunities for capturing stunning images.
To effectively capture the essence of a musical performance, consider incorporating various lighting techniques into your photography. Here are some key points to keep in mind:
- Ambient Lighting: Utilizing ambient lighting can create an atmospheric effect in your photos by capturing the overall mood of the venue. Experiment with different settings and exposure times to achieve desired results.
- Backlighting: Backlighting involves positioning your subject against a strong light source, such as stage lights or even natural sunlight coming from behind them. This technique adds depth and drama to your photographs.
- Light Painting: By using long exposure times, you can experiment with light painting during concerts. Encourage performers to use light sticks or other illuminated objects to create striking visual effects while their movements leave trails of light in your image.
- Strobe Flash: Incorporate strobe flash units synchronized with the beats of the music to freeze action moments and add dynamic energy to your shots.
Now let’s delve into some emotional responses these techniques can evoke:
- Capturing the raw emotion of musicians immersed in their craft
- Conveying the intensity and passion of live performances through vibrant colors and dramatic contrasts
- Creating visually captivating images that transport viewers into the heart of a musical experience
- Preserving fleeting moments that encapsulate the magic shared between artists and their audience
In addition to understanding these lighting techniques, it is important to select appropriate equipment that will protect and support your gear during music photo shoots. In our upcoming discussion about selecting camera bags for this purpose, we will explore factors such as durability, portability, and accessibility.
With a grasp of lighting techniques in mind, let’s now turn our attention to factors that need consideration when selecting a camera bag for music photo shoots.
Factors to consider when selecting a camera bag for music photo shoots
Exploring different lighting techniques for music photography can greatly enhance the quality and impact of your photos. By understanding how to manipulate light, you can create dynamic compositions that capture the energy and atmosphere of a live performance. Let’s consider an example to illustrate this concept.
Imagine you are photographing a rock concert in a dimly lit venue. Without proper lighting techniques, your images may turn out blurry or poorly exposed, failing to convey the excitement of the event. However, by employing specific strategies, such as using off-camera flash or adjusting white balance settings, you can achieve stunning results.
To help you further improve your music photography skills, here are some key factors to consider when it comes to lighting:
- Direction: Experiment with different angles and positions of light sources to create dramatic shadows or highlight specific elements on stage.
- Intensity: Adjust the power level of your lights or flashes to control the overall brightness in your images.
- Color temperature: Understand how different light sources emit varying color temperatures and adjust accordingly to maintain accurate colors.
- Light modifiers: Utilize tools like diffusers or reflectors to soften harsh light or redirect it for more pleasing effects.
By mastering these aspects of lighting in music photography, you can elevate your images from ordinary captures to captivating visual stories. The following bullet point list summarizes the emotional impact that effective lighting techniques can have on your photographs:
- Evokes a sense of drama and intensity
- Enhances the mood and atmosphere
- Highlights key performers or instruments
- Creates depth and dimension
In addition to understanding lighting techniques, selecting appropriate equipment is essential for successful music photography. In our next section, we will discuss factors to consider when choosing a camera bag specifically designed for music photo shoots. This will ensure that you have all the necessary gear neatly organized and protected while capturing those unforgettable moments onstage.
Understanding the purpose and effects of different types of filters will be crucial in enhancing your music photography even further. By utilizing filters, you can add unique visual effects or correct certain lighting conditions. Let’s delve into this topic in the upcoming section.
Understanding the purpose and effects of different types of filters
Factors to consider when selecting a camera bag for music photo shoots are crucial in ensuring the safety and convenience of your photography equipment. Let’s delve into these factors further, using a case study as an example.
Imagine you’re photographing a live concert at a large outdoor venue. As the sun sets, the lighting becomes challenging, requiring you to switch lenses frequently. In this scenario, having quick and easy access to your gear is essential. A camera bag with multiple compartments and dividers will allow you to organize your equipment effectively, enabling efficient lens changes without missing any shots.
When it comes to selecting a camera bag for music photography, durability is paramount. Music venues can be crowded and chaotic environments, prone to accidental bumps or spills. Opting for a bag made from sturdy materials like nylon or canvas can protect your equipment from potential damage caused by such incidents.
Additionally, comfort should not be overlooked. Carrying heavy gear throughout long hours of shooting can strain your body and hinder your ability to capture quality photos consistently. Look for bags that feature padded shoulder straps or back panels designed to distribute weight evenly across your shoulders and back.
Considerations when choosing a camera bag for music photo shoots:
- Size: Ensure the bag offers enough space for all your necessary equipment, including cameras, lenses, external flashes, batteries, memory cards, and other accessories.
- Security: Look for features like lockable zippers or built-in combination locks to deter theft and keep your gear safe.
- Weather resistance: Select a bag that provides protection against rain or dust if shooting outdoors in various weather conditions.
- Style: While aesthetics might seem less important than functionality, finding a camera bag that suits your personal style can enhance your overall experience as a photographer.
In summary, selecting the right camera bag for music photo shoots requires careful consideration of factors such as accessibility, durability, and comfort. By investing in the appropriate bag that meets your specific needs as a music photographer, you can ensure the safety and convenience of your equipment, allowing you to focus on capturing unforgettable moments.
Transitioning into the subsequent section about “Exploring essential camera accessories for music photography,” let’s now explore how these accessories can further enhance your capabilities as a music photographer.
Exploring essential camera accessories for music photography
Understanding the purpose and effects of different types of filters can significantly enhance the quality and creativity of music photography. For instance, let’s consider a hypothetical scenario where a photographer named Sarah is capturing images at a live concert. By using a neutral density (ND) filter, she can achieve longer exposure times even in bright lighting conditions. This allows her to create stunning motion blur effects with the performers or capture light trails from stage lights, adding dynamism and energy to her photographs.
When it comes to filters for music photography, there are several options available that cater to specific needs and creative preferences. Here are some key types of filters commonly used in this genre:
-
Polarizing Filters: These filters help reduce glare and reflections while enhancing color saturation and contrast. They are particularly useful when shooting outdoor music events during daylight hours, as they can make the sky appear deeper blue and intensify colors in the surroundings.
-
Graduated Neutral Density (GND) Filters: GND filters have a gradient effect that helps balance exposure between areas of high brightness, such as stage lights, and darker areas like the audience or background scenery. They allow photographers to maintain detail in both highlight and shadow regions, resulting in well-exposed photos with enhanced dynamic range.
-
Color Correction Filters: Music venues often utilize various colored lighting setups that can affect the overall color temperature of your images. Color correction filters can be employed to adjust white balance and ensure accurate color reproduction under challenging artificial lighting conditions.
- Capture mesmerizing light flares bouncing off guitar strings.
- Freeze the movement of musicians mid-performance with crispness.
- Enhance vibrant stage lighting by eliminating unwanted reflections.
- Create surreal visual effects through intentional motion blur techniques.
To further supplement our understanding, here is a table showcasing additional popular filter brands along with their unique features:
| Brand | Features |
|---|---|
| Lee Filters | Wide range of filter sizes |
| B+W | High-quality optical glass |
| Hoya | Scratch-resistant coatings |
| Tiffen | Multiple filter effect options |
In conclusion, understanding the purpose and effects of different filters is crucial for music photographers seeking to elevate their craft. By utilizing various types of filters, such as polarizing filters, graduated neutral density filters, and color correction filters, photographers can capture stunning images that convey the energy and ambiance of live music performances. So next time you’re shooting at a concert or gig, don’t forget to experiment with different filters to unlock new creative possibilities!